Operating Hours: 24 to 30 hours after fully charged
Battery Charge Time: 4 hours of sunlight
Battery Lifespan: 3 to 5 years
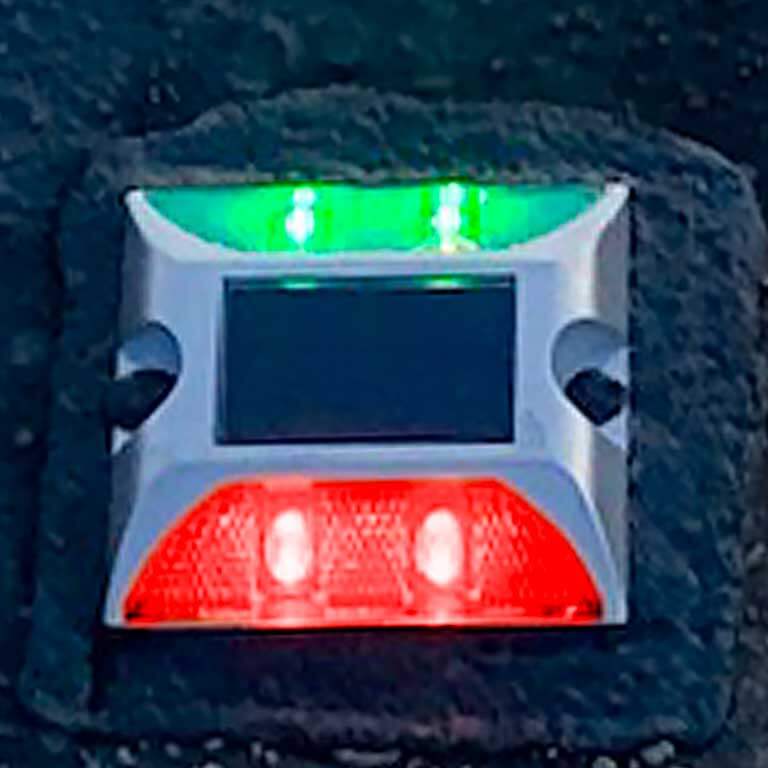
Solar Panel: Monocrystalline (4V/63mA)
Mounting Surfaces: Asphalt, concrete, turf, or dirt
Fixture Dimensions: 4″ x 4″ x .75″ (102 x 102 x 20mm)
Installation
Thermoplastic Adhesive Pad Installation Instructions
The optional adhesive pads are a non-toxic, zero VOC, performance thermoplastic adhesive designed to adhere markers to concrete or asphalt. When heated with a propane torch, the pad liquefies and fuses the marker to the pavement surface.
Required Equipment:
Propane-fueled torch (Gas Pony or equivalent) with 25 ft hose
Adequate propane supply
Safety glasses (or face shield), protective gloves, leather boots, long pants
Storage and Handling:
Store adhesive pads indoors in a dry location at 35°F to 90°F (2°C to 32°C) and keep them dry prior to installation.
Avoid dropping or throwing adhesive pads when ambient temperatures are below 50°F (10°C), as the material becomes less flexible and may crack.
Surface Requirements:
Asphalt and concrete pavement
Specialty paving surfaces such as brick, cobblestone, or stepping stones
Adhesive pads may also be installed over existing adhesive pads when the surface is clean and stable.
The pavement surface must be:
Free of dirt, dust, sand, debris, oils or chemical contamination
Completely dry prior to installation. If moisture is present, the installation area must be dried using the propane torch before placing the adhesive pad.
Propane Cylinder Safety:
Propane cylinders must always be operated in the upright position with the valve at the top.
Never lay the propane cylinder on its side, as this may allow liquid propane to enter the torch, creating a hazardous condition.
Installation Procedure:
Step 1 – Surface Preparation
Clean the installation area thoroughly. Remove all loose material including dust, sand, and debris.
A power blower may be used to clear the surface. The propane torch may also be briefly used to blow debris away from the application area.
Step 2 – Remove Surface Moisture
Ensure the pavement surface is completely dry. Surface moisture may not always be visible.
Use the propane torch to heat and dry the installation area if necessary.
Step 3 – Position Adhesive Pad
Set the adhesive pad in the desired location on the pavement surface.
Step 4 – Heat Adhesive Pad
Stand with the wind at your back so heat is directed away from the operator.
Using the propane torch, move the flame slowly and evenly across the adhesive pad. Continue heating until the pad becomes soft and molten, allowing it to spread slightly.
The adhesive pad must reach its melting temperature to achieve proper bonding with the pavement surface.
Step 5 – Install Marker
Immediately after the adhesive pad becomes molten, place the marker onto the adhesive using a gloved hand.
Apply gentle pressure to seat the marker into the adhesive pad.
Do not press the marker directly against the pavement surface. Maintain a thin layer of adhesive between the marker and the pavement.
The molten adhesive should flow into the recessed cavities on the underside of the marker, and flow through the anchor holes on both sides of the marker. This creates a mechanical bond that secures the fixture to the pavement.
Step 6 – Cooling
Allow the adhesive pad to cool and solidify. Under normal conditions, the adhesive will set within a few minutes.
Safer Pedestrians at Boston Logan Airport One of America’s busiest airports just go Read More
Get the longest warranty in the industry
We offer a 5-Year Warranty – the longest in the industry – on inpavement crosswalk warning systems. For over 20 years, we’ve been building high quality, certified traffic products.
Manage your privacy
To provide the best experiences, we use technologies like cookies to store and/or access device information. Consenting to these technologies will allow us to process data such as browsing behavior or unique IDs on this site. Not consenting or withdrawing consent, may adversely affect certain features and functions.
Functional
Always active
The technical storage or access is strictly necessary for the legitimate purpose of enabling the use of a specific service explicitly requested by the subscriber or user, or for the sole purpose of carrying out the transmission of a communication over an electronic communications network.
Preferences
The technical storage or access is necessary for the legitimate purpose of storing preferences that are not requested by the subscriber or user.
Statistics
The technical storage or access that is used exclusively for statistical purposes.The technical storage or access that is used exclusively for anonymous statistical purposes. Without a subpoena, voluntary compliance on the part of your Internet Service Provider, or additional records from a third party, information stored or retrieved for this purpose alone cannot usually be used to identify you.
Marketing
The technical storage or access is required to create user profiles to send advertising, or to track the user on a website or across several websites for similar marketing purposes.
We use technologies like cookies to store and/or access device information. We do this to improve browsing experience and to show (non-) personalized ads. Consenting to these technologies will allow us to process data such as browsing behavior or unique IDs on this site. Not consenting or withdrawing consent, may adversely affect certain features and functions.
Functional
Always active
The technical storage or access is strictly necessary for the legitimate purpose of enabling the use of a specific service explicitly requested by the subscriber or user, or for the sole purpose of carrying out the transmission of a communication over an electronic communications network.
Preferences
The technical storage or access is necessary for the legitimate purpose of storing preferences that are not requested by the subscriber or user.
Statistics
The technical storage or access that is used exclusively for statistical purposes.The technical storage or access that is used exclusively for anonymous statistical purposes. Without a subpoena, voluntary compliance on the part of your Internet Service Provider, or additional records from a third party, information stored or retrieved for this purpose alone cannot usually be used to identify you.
Marketing
The technical storage or access is required to create user profiles to send advertising, or to track the user on a website or across several websites for similar marketing purposes.